Quantcast
Channel: Indicators – AmiBroker Knowledge Base
Viewing all 24 articles
Browse latest View live

Calendar day index

$
0
0

Someone asked me recently how to count calendar days (not bars) that passed since first available quote. Here is a sample formula that shows how to do that.

SetBarsRequired(1000000,0);

function TotalDays()
{
 
yy Year();
 
dy DayOfYear();

 leapyear = ( yy ) == AND yy != 2000;

 yearlen IIfleapyear366365 ); 

 return yearlen * (yy yy]) + (dy dy[0]); 
}

td TotalDays();

Plottd"TotalDays"colorRed ); 

This function can be used to create some new interesting functions, for example the function that returns the value of array X calendar days back. I call it RefDays() because the syntax is almost the same as Ref() but it just uses calendar DAYS instead of bars.
Note that the function for simplicity handles only PAST references (‘days’ parameter is negative).

SetBarsRequired(1000000,0);

function TotalDays()
{
 
yy Year();
 
dy DayOfYear();

 leapyear = ( yy ) == AND yy != 2000;

 yearlen IIfleapyear366365 ); 

 return yearlen * (yy yy]) + (dy dy[0]); 
}

function RefDays( Array, Days )
{
  
td TotalDays();

  result Null;

  if( Days )
  {
     for( 
BarCount -1>= -Days)
     {
       for( 
0ij++ )
       {
          if( 
td] <= td] + Days )
          {
             
result] = Array[ ]; 
             
i
          }
       }
     }
  }
  return 
result;
}

PlotC"C"colorRed );
PlotRefC, -252 ), "Close 252 bars back"colorBlue );
PlotRefDaysC, -365 ), "Close 365 days back"colorGreen );

As above example shows referencing 365 calendar days back is not very different from referencing 252 trading EOD bars back, so for most applications it seems not worth the effort of using exact calendar day differences.

In the last example I want to show how to calculate number of calendar days in a range selected using begin/end markers (double click to mark begin and double click again to mark end).

function TotalDays()
{
 
yy Year();
 
dy DayOfYear();

 leapyear = ( yy ) == AND yy != 2000;

 yearlen IIfleapyear366365 ); 

 return yearlen * (yy yy]) + (dy dy[0]); 
}

td TotalDays();

Title "Number of days in selected range = " + ( EndValue(td) - BeginValue(td) );


How to fill the area between two lines with a solid color

$
0
0

This example shows how to fill the area between Bollinger Bands with a solid color.

To plot areas filled with solid color it is necessary to use styleCloud style:

To display a new indicator – do the following:
- Analysis -> Formula Editor
- enter:
 

Plot
Close"Price"colorBlackstyleCandle); 

btop BBandTop(Close);
bbot BBandBot(Close);
Plotbbot "BBot"colorGreenstyleThick);
Plotbtop "BTop"colorGreenstyleThick); 

PlotOHLCbtopbtopbbotbbot""colorYellow,styleCloud );


- Tools -> Apply Indicator

How to plot a trailing stop in the Price chart

$
0
0

In this short article we will show how to calculate and plot trailing stop using two different methods.

First method uses looping and it does not use ApplyStop() function as it does not plot stops – it only triggers them in backtest mode. The stop % level can be adjusted via PARAMETERS dalog.

StopLevel Param("trailing stop %"30.1100.1)/100;

Buy CrossMACD(), Signal() );
Sell 0;
trailARRAY Null;
trailstop 0;

for( 1BarCounti++ )
{

   if( trailstop == AND Buy] ) 
   { 
      
trailstop High] * stoplevel;
   }
   else 
Buy] = 0// remove excess buy signals

   if( trailstop AND Low] < trailstop )
   {
      
Sell] = 1;
      
SellPrice] = trailstop;
      
trailstop 0;
   }

   if( trailstop )
   {   
      
trailstop MaxHigh] * stopleveltrailstop );
      
trailARRAY] = trailstop;
   }

}

PlotShapes(Buy*shapeUpArrow,colorGreen,0,Low);
PlotShapes(Sell*shapeDownArrow,colorRed,0,High);

PlotClose,"Price",colorBlack,styleBar);
PlottrailARRAY,"trailing stop level"colorRed );


Trailing stop plot

Alternatively you can use code without looping, but then it requires Equity(1) to evaluate stops as shown in the example code below. Equity( 1 ) is the backtester-in-a-box that runs actual single-security backtest and when parameter 1 is passed it writes back signals (removing excessive ones and writing out all stops to Buy/Sell/Short/Cover arrays).

StopLevel Param("trailing stop %"30.1100.1 );

SetTradeDelays(0,0,0,0);

Buy CrossMACD(), Signal() );
Sell 0;
ApplyStopstopTypeTrailingstopModePercentStopLevelTrue );
 
Equity1); // evaluate stops, all quotes

InTrade FlipBuySell );

SetOption("EveryBarNullCheck"True );
stopline IIfInTradeHighestSinceBuyHigh ) * ( 0.01 StopLevel ), Null );

PlotShapes(Buy*shapeUpArrow,colorGreen,0,Low);
PlotShapes(Sell*shapeDownArrow,colorRed,0,High);

PlotClose,"Price",colorBlack,styleBar);
Plotstopline"trailing stop line"colorRed );

How to chart spreads?

$
0
0

To create a spread chart (and other multi-security indicators / statistics etc.) one can use FOREIGN function which allows to refer to other symbols than currently selected:

It’s necessary to do the following:
- Analysis -> Formula Editor
- enter the formula:

spread Foreign"ticker1""C") - Foreign"ticker2""C");
Plotspread"spread"colorRed); 

- Tools -> Apply Indicator
(replace ticker1, ticker2 with actual symbol names)

How to detect the divergences

$
0
0

There are many different ways to check for divergences. One of the simplest is to use Rate of change indicator and EXPLORATION feature of Automatic Analysis window:

- Analysis -> Formula Editor
- enter:
 
// 5 day rate of change of close
PriceUp ROCC) > 
// 5 day rate of change of MACD histogram
MacdUP ROCMACD() - Signal(), ) > 0
BullishDiv NOT PriceUP AND MACDUp;
BearishDiv PriceUP AND NOT MACDUp;
Filter BullishDiv OR BearishDiv;
AddColumnBullishDiv"Bullish Divergence"1.0
       
colorDefaultIIf(BullishDivcolorGreencolorDefault ) ); 
AddColumn
BearishDiv "Bearish Divergence"1.0
       
colorDefaultIIf(BearishDiv colorRedcolorDefault) );

- Tools -> Send to Auto-analysis
- Apply to: All Symbols, N last quotations = 1
- press EXPLORE

Tools -> Send to Auto-analysis- Apply to: All Symbols, N last quotations = 1- press EXPLORE

A different approach can use linear regression instead:
 
// 10 day linear regression slope of close
PriceUp LinRegSlopeC10 ) > 
// 10 day linear regression slope of MACD histogram
MacdUP LinRegSlopeMACD() - Signal(), 10 ); 


Low-level gfx example: Yearly/monthly profit chart

$
0
0

The code below is an little bit more complex example of Low Level Graphics functions (see http://www.amibroker.com/guide/a_lowlevelgfx.html)

It allows to display three kinds of charts:

  1. yearly/monthly profit table
  2. yearly profit bar chart
  3. average monthly profit bar chart

The type of chart is switchable from Parameters dialog.

It should be applied to ~~~EQUITY – portfolio equity symbol (so it only produces output if you run backtest before using it).

SetBarsRequired(1000000,1000000);
eq Foreign("~~~EQUITY""C" );

yr Year();
mo Month();

YearChange yr != Refyr, -);
MonChange mo != Refmo, -);

FirstYr 0;
LastYr 0;

startbar 0;

////////////////////////////
// SKIP non-trading bars
////////////////////////////
for( 0BarCounti++ )
{
  if( 
eq] )
  {
    
startbar i;
    break;
  } 
}

////////////////////////////
// collect yearly / monthly changes in equity
// into dynamic variables
////////////////////////////

LastYrValue eqstartbar  ];
LastMoValue eqstartbar  ];

MaxYrProfit MinYrProfit 0;
MaxMoProfit MinMoProfit 0;

for( startbar 1BarCounti++ )
{
  if( 
YearChange] || == BarCount )
  {
    
Chg 100 * ( -eq] / LastYrValue );
    
VarSet("ChgYear"yr], Chg );

    MaxYrProfit MaxMaxYrProfitChg );
    
MinYrProfit MinMinYrProfitChg );

    if( FirstYr == FirstYr yr];
    
LastYr yr];

    LastYrValue eq];
  }

  if( MonChange ] || == BarCount )
  {
    
mon mo];

    Chg 100 * ( -eq] / LastMoValue );

    VarSet("ChgMon" yr] + "-" monChg );
    
VarSet("SumChgMon"monChg NzVarGet("SumChgMon"mon ) ) );
    
VarSet("SumMon" monNzVarGet("SumMon"mon ) ) );
 
    
MaxMoProfit MaxMaxMoProfitChg );
    
MinMoProfit MinMinMoProfitChg );

    LastMoValue eq];
  }
}

/////////////////////////////////////////////////
// Drawing code & helper functions
////////////////////////////////////////////////

GfxSetOverlayMode);

CellHeight = (Status("pxheight")-1)/(LastYr FirstYr ); 
CellWidth = (Status("pxwidth")-1)/14
GfxSelectFont"Tahoma"8.5 ); 

GfxSetBkMode);

function PrintInCellstringrowCol 
{
 
Color =  ColorRGBIIfrow == || col == || col == 13220255 ), 255IIfrow 2255220 ) );
 
GfxSelectSolidBrushColor   );
 
GfxRectangleCol CellWidth
                    
row CellHeight, (Col ) * CellWidth 1
                    (
row ) * CellHeight  1); 
 
GfxDrawTextstringCol CellWidth 1
                    
row CellHeight 1
                    (
Col ) * CellWidth, (row ) * CellHeight32+); 

YOffset 25;
XOffset 15;

function DrawBartextbarnumbarsyMinyMaxy )
{
 
BarWidth = (Status("pxwidth") - XOffset )/( numbars ); 
 
BarHeight Status("pxheight") - YOffset;
 
relpos = ( Miny ) / (Maxy Miny );

 xp XOffset + ( bar 0.5 ) * BarWidth;
 
yp YOffset BarHeight * ( relpos );
 
xe XOffset + ( bar ) * BarWidth;
 
ye YOffset BarHeight * ( - ( -miny )/( maxy miny ) );
  
 if( 
)
 {
 
GfxGradientRectxpyp
                  
xe ye,
                  
ColorHSB70255 relpos255 ), ColorHSB7020255 ) ); 
 }
 else
 {
 
GfxGradientRectxpye
                  
xe yp,
                  
ColorHSB020255 ), ColorHSB0255 * ( relpos ), 255 ) ); 
 }
 
GfxTextOuttextxpye );
 
GfxTextOutStrFormat("%.2f"), xpyp );
}    

function DrawLevelsMinyMaxy )
{
  
range Maxy Miny;

  grid 100;
  if( 
range 10 grid 1;
  else 
  if( 
range 20 grid 2;
  else 
  if( 
range 50 grid 5;
  else 
  if( 
range 100 grid 10;
  else 
  if( 
range 200 grid 20;
  else 
  if( 
range 500 grid 50;

  _TRACE("grid = "+grid +" range "+range );
  
  
width Status("pxwidth") - XOffset;
  
height Status("pxheight") - YOffset;

  GfxSelectPencolorBlack1);
  for( 
grid ceilMiny grid ); <= grid floorMaxy grid ); += grid )
  {
    
yp =  YOffset Height * ( -  ( Miny ) / (Maxy Miny ) );

    GfxMoveToXOffsetyp );
    
GfxLineToXOffset width yp );
    
GfxTextOut""yXOffset widthyp );
  }

  GfxSelectPencolorBlack1);
  
GfxMoveToXOffsetYOffset );
  
GfxLineToXOffset widthYOffset );
  
GfxLineToXOffset widthYOffset Height );
  
GfxLineToXOffset YOffset Height );
  
GfxLineToXOffset YOffset );
}

MonthNames "Jan,Feb,Mar,Apr,May,Jun,Jul,Aug,Sep,Oct,Nov,Dec";

function DisplayProfitTable( )
{
 
Header "Year,"+MonthNames+",Yr Profit%";
 for( 
Col 0; (Colname StrExtractHeaderCol ) ) != ""Col++ )
 {
  
PrintInCellColName0Col );
 }

 Row 1;
 for( 
FirstYr<= LastYry++ )
 {
  
PrintInCellStrFormat("%g"), Row); 
  
PrintInCellStrFormat("%.1f%%"VarGet("ChgYear" ) ), Row13 ); 
  for( 
1<= 12m++ )
  { 
   
Chg VarGet("ChgMon" "-" m);
   if( 
Chg 
     
PrintInCellStrFormat("%.1f%%"Chg ), Row);
   else
     
PrintInCell"N/A"Row);
  }
  
Row++;
 } 

 PrintInCell("Mon. Avg"Row);
 for( 
1<= 12m++ )
 { 
   
PrintInCellStrFormat("%.1f%%",  NzVarGet("SumChgMon" m)/VarGet("SumMon" ) ) ), Row);
 }

}

function DisplayYearlyProfits()
{
 
Bar 0;
 for( 
FirstYr<= LastYry++ )
 {
   
Chg VarGet("ChgYear" );
   
DrawBar""+yBar++, ( LastYr FirstYr ), ChgMinYrProfitMaxYrProfit );
 }
 
GfxTextOut("Yearly % Profit chart"1010 );

 DrawLevelsMinYrProfitMaxYrProfit ); 
}

function DisplayMonthlyProfits()
{
 
Bar 0;
 
 
MinAvgProf MaxAvgProf 0;
 for( 
1<= 12y++ )
 {
   
Chg VarGet("SumChgMon" ) / VarGet("SumMon" );
   
MinAvgProf MinMinAvgProfChg );
   
MaxAvgProf MaxMaxAvgProfChg );
 }

 for( 1<= 12y++ )
 {
   
Chg VarGet("SumChgMon" ) / VarGet("SumMon" );
   
DrawBarStrExtract(MonthNamesy-), Bar++, 13ChgMinAvgProf MaxAvgProf );
 }
 
GfxTextOut("Avg. Monthly % Profit chart"1010 );

 DrawLevelsMinAvgProf MaxAvgProf ); 
}

///////////////////////////
// This function checks if currently selected symbol
// is portfolio equity
//////////////////////////
function CheckSymbol()
{
 if( 
Name() != "~~~EQUITY" )
 {
  
GfxSelectFont"Tahoma"20 ); 
  
GfxSetBkMode);
  
GfxTextOut("For accurate results switch to ~~~EQUITY symbol"1010 );
 }
}

////////////////////////////
// Main program - chart type switch
////////////////////////////
type ParamList("Chart Type""Profit Table|Yearly Profits|Avg. Monthly Profits");

switch( type )
{
 case 
"Profit Table"
         
DisplayProfitTable();  
         break;
 case 
"Yearly Profits"
         
DisplayYearlyProfits();
         break;
 case 
"Avg. Monthly Profits"
         
DisplayMonthlyProfits();
         break;
}

CheckSymbol();

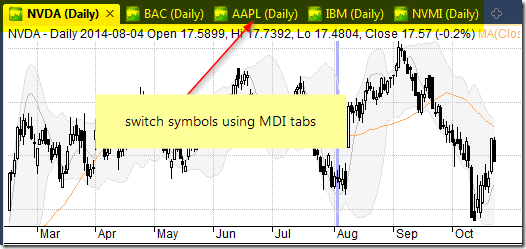
Figure 1. Profit chart in table mode

Profit chart example 2

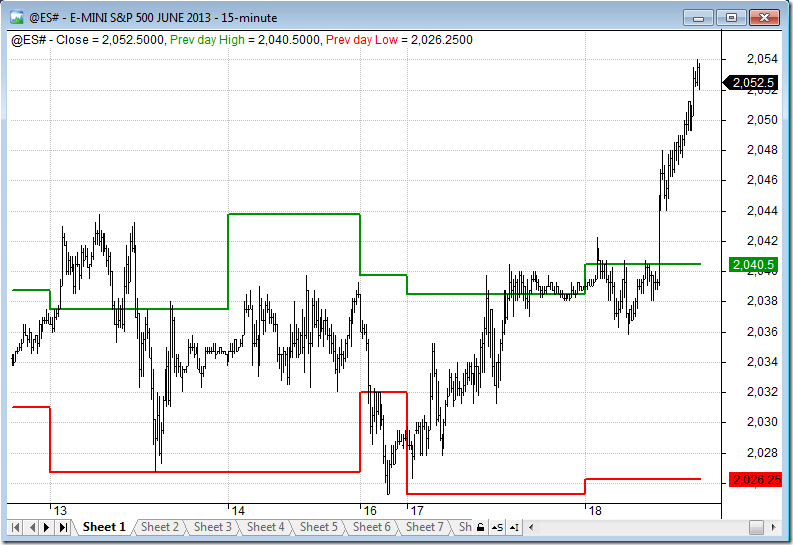
Figure 2. Profit chart in yearly mode

Profit chart example 3

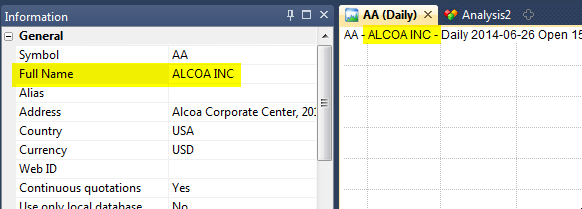
Figure 3. Profit chart in monthly mode

Profit chart example 4

Big symbol text in the background

$
0
0

Recently I heard the suggestion to add a security symbol written in big letters in the chart background. Well, actually it is pretty simple to do using low-level gfx. Just add this code sniplet anywhere in your chart formula.

GfxSetOverlayMode(1);
GfxSelectFont("Tahoma"Status("pxheight")/);
GfxSetTextAlign);// center alignment
GfxSetTextColorColorRGB200200200 ) );
GfxSetBkMode(1); // transparent
GfxTextOutName(), Status("pxwidth")/2Status("pxheight")/12 );

UPDATE: I have added transparent mode, so it works fine on non-white backgrounds too.

QuickAFL facts

$
0
0

QuickAFL(tm) is a feature that allows faster AFL calculation under certain conditions. Initially (since 2003) it was available for indicators only, as of version 5.14+ it is available in Automatic Analysis too.

Initially the idea was to allow faster chart redraws through calculating AFL formula only for that part which is visible on the chart. In a similar manner, automatic analysis window can use subset of available quotations to calculate AFL, if selected “range” parameter is less than “All quotations”.

So, in short QuickAFL works so it calculates only part of the array that is currently visible (indicator) or within selected range (Automatic Analysis).

Your formulas, under QuickAFL, may or may NOT use all data bars available, but only visible (or “in-range”) bars (plus some extra to ensure calculation of used indicators), so when you are using Close[ 0 ] it represents not first bar in entire data set but first bar in array currently used (which is just a bit longer than visible, or ‘in-range’ area).

The QuickAFL is designed to be transparent, i.e. do not require any changes to the formulas you are using. To achieve this goal, AmiBroker in the first execution of given formula “learns” how many bars are really needed to calculate it correctly.

To find out the number of bars required to calculate formula AmiBroker internally uses two variables ‘backward ref’ and ‘forward ref’.

‘backward ref’ describes how many PREVIOUS bars are needed to calculate the value for today, and ‘forward ref’ tells how many FUTURE bars are needed to calculate value for today.

If these numbers are known, during execution of given formula AmiBroker takes FIRST visible (or in-range) bar and subtracts ‘backward ref” and takes LAST visible (or in-range) bar and adds ‘forward ref’ to calculate first and last bar needed for calculation of the formula.

Now, how does AmiBroker know a correct “backward ref” and “forward ref” for the entire formula?
Well, every AmiBroker’s built-in function is written so that it knows its own requirements and adds them to global “backward ref” and “forward ref” each time given function is called from your formula.

The whole process starts with setting initial BackwardRef to 30 and ForwardRef to zero. These initial values are used to give “safety margin” for simple loops/scripts.

Next, when parser scans the formula like this:

Buy Ref MAC40 ), -);

it analyses it and “sees” the MA with parameter 40. It knows that simple moving average of period 40 requires 40 past bars and zero future bars to calculate correctly so it does the following (all internally):

BackwardRef BackwardRef 40;
ForwardRef ForwardRef 0;

So now, the value of BackwardRef will be 70 (40+30(initial)), and ForwardRef will be zero.

Next the parser sees Ref( .., -1 );

It knows that Ref with shift of -1 requires 1 past bar and zero future bars so it “accumulates” requirements this way:

BackwardRef BackwardRef 1;
ForwardRef ForwardRef 0;

So it ends up with:

BackwardRef 71;
ForwardRef 0;

The BackwardRef and ForwardRef numbers are displayed by AFL Editor’s Tools->Check and Profile as well as on charts when “Display chart timing” is selected in the preferences.

If you use Check and Profile tool, it will tell you that the formula

Buy Ref MAC40 ), -);

requires 71 past bars and 0 future bars.

You can modify it to

Buy Ref MAC50 ), -);

and it will tell you that it requires 82 past bars (30+50+2) and zero future bars.

If you modify it to

Buy Ref MAC50 ), );

It will tell you that it needs 80 past bars (30+50) and ONE future bar (from Ref).

Thanks to that your formula will use 80 bars prior to first visible (or in-range) bar leading to correct calculation result, while improving the speed of execution by not using bars preceding required ones.

IMPORTANT NOTES

It is very important to understand, that the above estimate requirements while fairly conservative,
and working fine in majority of cases, may NOT give you identical results with QuickAFL enabled, if your formulas use:
a) JScript/VBScript scripting
b) for/while/do loops using more than 30 past bars
c) any functions from external indicator DLLs
d) certain functions that use recursive calculation such as very long exponential averages or TimeFrame functions with much higher intervals than base interval

In these cases, you may need to use SetBarsRequired() function to set initial requirements to value higher than default 30. For example, by placing

SetBarsRequired1000);

at the TOP of your formula you are telling AmiBroker to add 1000 bars PRIOR to first visible (or in-range) bar to ensure more data to stabilise indicators.

You can also effectively turn OFF QuickAFL by adding:

SetBarsRequiredsbrAllsbrAll );

at the top of your formula. It tells AmiBroker to use ALL bars all the time.

It is also worth noting that certain functions like cumulative sum (Cum()) by default request ALL past bars to guarantee the same results when QuickAFL is enabled. But when using such a function, you may or may NOT want to use all bars. So SetBarsRequired() gives you also ability to DECREASE the requirements of formula. This is done by placing SetBarsRequired at the END of your formula, as any call to SetBarsRequired effectively overwrites previously calculated estimate. So
if you write

Cum);
SetBarsRequired1000); // use 1000 past bars DESPITE using Cum()

You may force AmiBroker to use only 1000 bars prior first visible even though Cum() by itself would require all bars.

It is also worth noting that when QuickAFL is used, BarIndex() function does NOT represent elements of the AFL array, but rather the indexes of ENTIRE quotation array. With QuickAFL turned on, an AFL array is usually shorter than quotation array, as illustrated in this picture:

QuickAFL, BarIndex and BarCount

SPECIAL CASE: AddToComposite function

Since AddToComposite creates artificial stock data it is desirable that it works the same regardless of how many ‘visible’ bars there are or how many bars are needed by other parts of the formula.

For this reason internally AddToComposite does this:

SetBarsRequiredsbrAllsbrAll );

which effectivelly means “use all available bars” for the formula. AddToComposite function simply tells the AFL engine to use all available bars (from the very first to the very last) regardless of how formula looks like. This is to ensure that AddToComposite updates ALL bars of the composite

The side-effect is that “Check And Profile” feature will see that it needs to reference future bars and display a warning even though this is false alert because AddToComposite itself has no impact on trading system at all.

Now why this shows only when flag atcFlagEnableInBacktest is on ??
It is simple: this is so because it means that AddToComposite is ACTIVE in BACKTEST.
http://www.amibroker.com/guide/afl/afl_view.php?name=ADDTOCOMPOSITE

Since “Check And Profile” uses “BACKTEST” state you get such result.

If atcFlagEnableInBacktest is not specified AddToComposite is not enabled in Backtest and hence does not affect calculation of BackwardRef and ForwardRef during “Check And Profile”.

BACKWARD COMPATIBILITY NOTES

a) QuickAFL is available in Automatic Analysis in version 5.14.0 or higher
b) sbrAll constant is available in Automatic Analysis in version 5.14.0 or higher. If you are using older versions you should use numeric constant of: 1000000 instead.


How to convert from bar-value to pixel co-ordinates

$
0
0

Sometimes when using low-level graphics functions it is needed to convert from bar number to pixel X co-ordinate and from price level to pixel Y co-ordinate. Converting between them needs knowing visible bar range, Y-axis value range and pixel dimensions of drawing area. Once these params are known it is just a matter of performing simple scale transformation. The code example below shows how to do that.

function GetVisibleBarCount() 

 
lvb Status("lastvisiblebar"); 
 
fvb Status("firstvisiblebar"); 

 return MinLvb fvbBarCount fvb ); 

function GfxConvertBarToPixelXbar 

 
lvb Status("lastvisiblebar"); 
 
fvb Status("firstvisiblebar"); 
 
pxchartleft Status("pxchartleft"); 
 
pxchartwidth Status("pxchartwidth"); 

 return pxchartleft bar  pxchartwidth / ( Lvb fvb ); 

function GfxConvertValueToPixelYValue 

 
local MinyMaxypxchartbottompxchartheight

 Miny Status("axisminy"); 
 
Maxy Status("axismaxy"); 

 pxchartbottom Status("pxchartbottom"); 
 
pxchartheight Status("pxchartheight"); 

 return pxchartbottom floor0.5 + ( Value Miny ) * pxchartheight/ ( Maxy Miny ) ); 

Plot(C"Price"colorBlackstyleHistogram ); 

GfxSetOverlayMode(0); 
GfxSelectSolidBrushcolorRed ); 
GfxSelectPencolorRed ); 

AllVisibleBars GetVisibleBarCount(); 
fvb Status("firstvisiblebar"); 

for( 0AllVisibleBars i++ ) 

  
GfxConvertBarToPixelX); 
  
GfxConvertValueToPixelYCfvb ] ); 

  GfxRectanglex-1y-12y+); 

RequestTimedRefresh(1); // ensure 1 sec refresh

Note that when chart scale changes, it will usually require one extra refresh to get low-level graphics alignment to new scale. That’s why we added RequestTimedRefresh call at the end.

Study() function in logarithmic scale

$
0
0

IMPORTANT: This article applies ONLY to AmiBroker version 5.24 and earlier. Version 5.25 includes native support for log scale in Study() function and this workaround is no longer needed.

Some of you may have tried using Study() function in logarithmic scale charts and noticed that the output of Study() function becomes curved line (not straight) as soon as logarithmic scale is used.

Before giving you solution, I would like to state some obvious things:
A straight line in log scale is NOT straight line in linear scale and vice versa. Trendlines drawn in log scale do NOT cross at the same points (except beginning and ending) as same trendline drawn in linear scale. This is pretty much the same in all charting programs.

As for the Study() function – it always uses LINEAR equation y = a*x + b regardless of particular chart scale. So, Study() always produces straight line in the linear price domain, so “a” coefficient is constant and represents the slope in price terms (dollar per bar)

This is done so, because Automatic Analysis does not have a concept of “scale” (linear vs logarithmic), therefore if Study() function was dependent on given pane setting it would not produce the same result, if the same formula was used in automatic analysis.

If you want to have “straight” line in the logarithmic price domain you need to convert to log domain in the formula, as shown in the code below


function StudyInLogScaleStudyidChartid )
{
  if( 
Version() < 5.25 )
  {
   
SetBarsRequiredsbrAllsbrAll );

   temp StudyStudyidChartid );

   bi BarIndex();

   beg LastValueValueWhenExRemtemp), bi ) ); 
   
end LastValueValueWhentempbi ) );

   result Null;
 
   if( 
beg BarCount AND end BarCount )
   {
    
begval tempbeg ];
    
endval tempend ];
    
factor endval/begval;

    for( beg<= endi++ )
    {
      
result] = begval factor ^ ( ( beg )/( end beg ) ); 
    }
   }
  }
  else
  {
    
result StudyStudyidChartid );
  }

  return result;        
}

logscale ParamToggle("Log Scale""Off|On");

SetChartOptionsIIflogScale2), chartLogarithmic );

PlotC"Price"colorBlackstyleCandle );

if( logscale AND Version() <= 5.24 )
{
 
ss StudyInLogScale("RE"GetChartID() );
}
else
{
 
ss Study("RE"GetChartID() );
}

Plotss"Study"colorRed );

How to draw regression channel programatically

$
0
0

Built-in drawing tool allows to place regression channel on the chart manually and the study works on regular Close array as input. The power of AFL allows to automate this task and draw a customizable regression channel automatically in the chart or choose any custom array for calculation.

Here is a sample coding solution showing how to code Standard Deviation based channel. The Parameters dialog allows to control the array the channel is based upon, number of periods used for calculation, position and width of the channel.

lookback Param"Look back"201200);
shift Param"Shift"0020);
multiplier Param"Width"10.2550.25 );
color ParamColor"Color"colorRed );
style ParamStyle"Style"styleLine styleDots );
pricestyle ParamStyle"Price style"styleBar styleThickmaskPrice );
//
// price chart
PlotClose"Close"colorDefaultpricestyle );
//
array = ParamField"Price field", -);
//
BarIndex() + 1;
lastx LastValue) - shift;
//
// compute linear regression coefficients
aa LastValueRefLinRegIntercept( array, lookback ), -shift ) );
bb LastValueRefLinRegSlope( array, lookback ), -shift ) );
//
// the equation for straight line
Aa bb * ( - ( Lastx lookback ) );
//
width LastValueRefStDev( array, lookback ), -shift ) );
//
drawit > ( lastx lookback ) AND BarIndex() < Lastx;
//
// draw regression line...
PlotIIfdrawityNull ), "LinReg"colorstyle );
// ... and channel
PlotIIfdrawitwidth*multiplier Null ), "LinReg UP"colorstyle );
PlotIIfdrawitwidth*multiplier Null ), "LinReg DN"colorstyle );

Here is the picture that shows how it looks:

Regression in AFL

Time compression of data retrieved from another symbol

$
0
0

AmiBroker’s Time-Frame functions (http://www.amibroker.com/guide/h_timeframe.html) allow to use multiple intervals within a single formula and combine them together. Another set of functions in AFL (Foreign and SetForeign) allow us to retrieve data of another symbol from the database, so we can implement strategies where rules are based on multiple symbols.

This article shows how to combine these two features together and properly use Time-Frame functions on data retrieved from another symbol. Let us consider an example of a strategy, which works on daily data, but uses an additional filter based on weekly readings of S&P500 index.

The following sequence is required to code such conditions properly:

  1. switch to the other symbol with SetForeign
  2. compress data into higher interval with TimeFrameSet
  3. store the weekly values / conditions in custom variables
  4. with TimeFrameRestore() or RestorePriceArrays() functions restore the original arrays of the tested symbol (in the original time-frame)
  5. use custom variables assigned in step (3) expanded to original time-frame using TimeFrameExpand()

Here is the AFL formula, which implements the above conditions:

// first switch to ^GSPC symbol
SetForeign"^GSPC" );
//
// compress data to weekly interval
TimeFrameSetinWeekly );
//
// assign weekly values to custom variables
indexWeeklyClose Close;
indexWeeklyMA =  MAClose52 );
indexWeeklyFilter Close MAClose52 );
//
// restore original arrays (back to the primary symbol)
// RestorePriceArrays() function is an equivalent
TimeFrameRestore();
//
// align data back to original interval
indexFilterExpanded TimeFrameExpandindexWeeklyFilterinWeekly );
//
// exploration shows the results, note that all weekly values
// need to be expanded if we haven't done it yet
//
Filter 1;
AddColumnClose"Close AAPL" );
AddColumnTimeFrameExpandindexWeeklyCloseinWeekly ), "Weekly close ^GSPC" );
AddColumnTimeFrameExpandindexWeeklyMAinWeekly ), "Weekly MA ^GSPC" );
AddColumnindexFilterExpanded"Weekly index filter");

Let us compare the readings obtained from the code with a sample chart – both ^GSPC raw reading and 52-week MA values match the chart and the condition is properly aligned to the bars starting on 2011-10-28 and extends until new weekly bar is formed.

TimeFrame + Foreign

There is also an alternative method we can use:

  1. retrieve values from ^GSPC using Foreign() function
  2. compress these readings into weekly interval using TimeFrameCompress
  3. perform calculations on weekly compressed array
  4. expand the compressed data back to the original timeframe using timeFrameExpand
indexClose Foreign("^GSPC","C");
indexWeeklyClose2 TimeFrameCompressindexCloseinWeekly );
indexWeeklyMA2 MAindexWeeklyClose252 );
indexWeeklyFilter2 indexWeeklyClose2 indexWeeklyMA2;
//
Filter 1;
AddColumnClose"Close AAPL" );
AddColumnTimeFrameExpandindexWeeklyClose2inWeekly ), "Weekly close ^GSPC" );
AddColumnTimeFrameExpandindexWeeklyMA2inWeekly ), "Weekly MA ^GSPC" );
AddColumnTimeFrameExpandindexWeeklyFilter2inWeekly ), "Weekly index filter");

Using per-symbol parameter values in charts

$
0
0

Parameter values in AmiBroker are stored separately for each ChartID. A ChartID is a number that uniquely identifies chart. This makes it possible that parameters having same name can hold different values when they are used in different charts (different ChartIDs). This also allows to share parameters if two panes use same ChartID. (A detailed explanation can be found here: http://www.amibroker.com/kb/2014/10/06/relationship-between-chart-panes/ )

For this reason, if we want to have separate chart parameters for each symbol, we need to set up separate chart for every symbol. To do so, follow these steps:

  1. create several new chart windows using File->New->Blank Chart (or choosing New Blank Chart from the menu under + button in MDI tabs area)
    New Blank Chart
  2. drag Price( all in one) formula or any other indicators onto each of the newly opened windows
    Drag-drop chart
  3. select different active symbol for every chart
  4. define parameters individually and save the whole layout in the Layouts window

As a result – we have a setup of several chart windows, where we can quickly access given symbol showing chart with its separately stored parameters.

MDI Charts

There is also a way to handle the chart parameter values directly from the AFL formula, which would detect the active symbol and set the parameter values accordingly. Here is an example of such implementation using switch statement:
http://www.amibroker.com/guide/keyword/switch.html

To display this chart, open the Formula Editor, enter the following code and then press Apply Indicator button.

// detect the active symbol and store in n variable
Name();

// set parameter values based on the symbol name
switch ( )
{
// values for MSFT symbol
case "MSFT":
    MA1periods 10;
    MA2periods 21;
    break;

// values for IBM and NVDA
case "IBM":
case "NVDA":
    MA1periods 30;
    MA2periods 40;
    break;

// values for other tickers
default:
    MA1periods 50;
    MA2periods 100;
    break;
}

PlotClose"C"colorDefaultstyleBar );

PlotMACloseMA1periods ) , "MA(" MA1Periods ")" colorRed );
PlotMACloseMA2periods ) , "MA(" MA2Periods ")"colorBlue );

This way we can handle all individual parameter values within a single chart pane.

Indicators based on user values rather than standard OHLC prices

$
0
0

Sometimes we may want to calculate indicators based not only on standard OHLC prices but on some other user-definable values. Some functions like RSI or CSI have additional versions (RSIa, CCIa respectively) that accept custom input array. In this case it is very easy to calculate the indicator based on user defined value. For example RSI from average of High and Low prices could be written as follows:

customArray = ( High Low ) / 2;

PlotRSIacustomArray14 ), "RSI from (H+L)/2"colorRed );

But many of the built-in indicators available in AFL as functions refer indirectly to standard OHLC arrays and their parameters do not offer array argument as one of inputs.

Fortunatelly there is an easy way to provide custom array as input for any other built-in functions. For this purpose, it is enough to override OHLC arrays (or just Close if the indicator only uses Close as input) within the code before calling given function and assign our custom array. As a simple example, let us consider calculating MACD indicator out of average of High and Low prices as input.

procedure SaveRestorePricesDoSave )
{
  global SaveOSaveHSaveLSaveCSaveV;
  
  if( DoSave )
  {
     SaveO Open;
     SaveH High;
     SaveL Low;
     SaveC Close;
     SaveV Volume;
  }
  else
  {
    Open SaveO;
    High SaveH;
    Low SaveL;
    Close SaveC;
    Volume SaveV;
  }
}

// save OHLCV arrays
SaveRestorePricesTrue );

// calculate our array
customArray = ( High Low ) / 2;

// override built-in array(s)
Close customArray;

// calculate our function, MACD and Signal in this case
PlotMACD1226 ), "MACD"colorRed );
PlotSignal1226), "Signal"colorBlue );

// restore OHLCV arrays
SaveRestorePricesFalse );

The code first calculates the custom array (we use just use average of High and Low prices in this example, but of course the calculations may be more complex), then assigns the result of these calculations to Close overriding the regular values stored in close array. Then – when we call MACD() function which uses Close as input – it will be based on the modified values.

The above operations do not affect the underlying database at all – the prices are overridden only for the purpose of calculation of this particular formula and other charts / indicators are not affected at all.

How to plot daily High and Low on intraday chart

$
0
0

The AFL offers a set of time-frame functions which allow to use multiple intervals within a single formula (the topic is explained in details in the following tutorial chapter: http://www.amibroker.com/guide/h_timeframe.html)

In situations, where we do not need to calculate any indicators based on higher interval data, but rather just read OHLC, V or OI arrays – TimeFrameGetPrice is the most convenient function to use.

To plot daily High and Low levels we just need to read the respective arrays calling: TimeFrameGetPrice(“H”, inDaily ) – the first argument specifies the array we want to read, the second argument defines the interval we are reading data from. As with any other TimeFrame functions – we can only read data from higher intervals, so it is possible to read daily data when we work with 1-minute quotes, but not the other way round.

Here is a sample formula which draws daily high and low in the intraday chart:

PlotClose"Close"colorDefaultstyleBar );
PlotTimeFrameGetPrice("H"inDaily ), "day high"colorGreenstyleStaircase styleThick);
PlotTimeFrameGetPrice("L"inDaily ), "day low"colorRedstyleStaircase styleThick); 

TimeFrameGetPrice() functions allow also to easily shift the reading by N-bars of the higher interval if we specify that in 3rd argument of the function, so calling TimeFrameGetPrice( “H”, inDaily, -1 ) will return the high of previous day.

The following code draws high / low of previous day on top of the intraday chart:

PlotClose"Close"colorDefaultstyleBar );
hlstyle styleStaircase styleThick;
PlotTimeFrameGetPrice"H"inDaily, -), "Prev High"colorGreenhlstyle );
PlotTimeFrameGetPrice"L"inDaily, -), "Prev Low"colorRedhlstyle ); 

Daily H-L


Using loops with TimeFrame functions

$
0
0

AmiBroker features a powerful set of TimeFrame functions that allow combining different time intervals in single system formula. There is one aspect of TimeFrame functions that is important to understand to properly use them. When we switch to higher interval using TimeFrameSet function – the BarCount does not really change – TimeFrameSet just squeezes the arrays so we have first N-bars filled with Null values (undefined) and then – last part of the array contains the actual time-compressed values. This is explained in details here: http://www.amibroker.com/guide/h_timeframe.html

Normally it does not present any problem as long as we use array functions, because array functions check for Nulls occuring at the beginning of the data series and skip them appropriately. The story is different when we try to use loops.

If we want to use looping code in higher time-frame, we can not really start our calculations from the bar 0, because it would contain Null instead of real data. That is why we would first need to detect were the actual compressed data begins and start calculations on that particular bar instead.

Here is a sample formula showing how to compute AMA function in a loop, based on weekly data (the code should be applied in Daily interval). Code will identify the first non-Null bar and initialize the first AMA value with Close of that bar, then it will continue calculations

PlotClose"Close"colorBlack );

// switch to higher timeframe
TimeFrameSetinWeekly );

smooth 0.2;
myAMA Close;

// search for start (non-null) bar
for( start 0start BarCountstart++ )
{
   if( NOT IsNullClosestart ] ) ) break;
}

// looping code
for ( start 1BarCounti++ )
{
    // this part will execute only after the first non-null bar has been identified
    myAMA] = Close] * smooth myAMA] * ( smooth );
}

// regular AMA function for comparison
weeklyAMA AMAClose0.2 );

//restore original time-frame
TimeFrameRestore();

// plot expanded values retrieved from Weekly frame
PlotTimeFrameExpandmyAMAinWeekly ), "weekly AMA loop"colorRed );
PlotTimeFrameExpandweeklyAMAinWeekly ), "weekly AMA"colorBluestyleDots );

The code above is good for pre-5.90 versions. In version 5.90 we have a new function that counts Nulls for us making the code shorter and clearer, as shown below:

Version5.90 );

PlotClose"Close"colorBlack );

// switch to higher timeframe
TimeFrameSetinWeekly );

smooth 0.2;
myAMA Close;

// new 5.90 function that counts leading Nulls
start NullCountClose );

// looping code
for ( start 1BarCounti++ )
{
    // this part will execute only after the first non-null bar has been identified
    myAMA] = Close] * smooth myAMA] * ( smooth );
}

// regular AMA function for comparison
weeklyAMA AMAClose0.2 );

//restore original time-frame
TimeFrameRestore();

// plot expanded values retrieved from Weekly frame
PlotTimeFrameExpandmyAMAinWeekly ), "weekly AMA loop"colorRed );
PlotTimeFrameExpandweeklyAMAinWeekly ), "weekly AMA"colorBluestyleDots );

How to add full name to the Price chart title

$
0
0

The full name of the security can be retrieved in AFL using FullName() function.

In order to add such information to the built-in Price chart, we need to do the following:

  1. Click on the chart with right mouse button
  2. Choose Edit Formula from the context menu
  3. Modify the Title definition line, the built-in code contains:
    _N(Title StrFormat("{{NAME}} - {{INTERVAL}} {{DATE}} Open %g, Hi %g, Lo %g, Close %g (%.1f%%)", 
                         OHLCSelectedValueROCC) ) ));

    We need to change it into:

    _N(Title StrFormat("{{NAME}} - " + 
                          FullName() + 
                          " - {{INTERVAL}} {{DATE}} " +
                          "Open %g, Hi %g, Lo %g, Close %g (%.1f%%) Vol %.0f", 
                          OHLCSelectedValueROCC) ), ) );
  4. To apply these changes choose Tools->Apply Indicator from the menu.

If we have Full name information imported into the database and visible in Symbol->Information window, the updated chart title will show it next to the ticker name.

Fullname in the chart title

Drawing indicators on a subset of visible bars

$
0
0

By default, the Plot function draws the graph for all visible bars. In some situations however, we may want to draw some selected bars, leaving remaining chart space unaffected.

To achieve that – we simply assign Null value for the bars that we want to skip. Our graph will just be drawn for the non-null bars.

This simple example draws candlesticks only on Mondays and leaves empty all the other days.

IsMonday DayOfWeek() == 1;
// assign Close for Mondays, otherwise assign Null
Data IIfIsMondayCloseNull ); 
// plot the data
PlotData"Chart of Mondays"colorDefaultstyleCandle );

The following example shows how to restrict the visibility to last N bars. The code defines a custom function, which can be called later on for the arrays we want to show only partially.

// custom function definition
function LastNBars( array, bars )
{
    bi BarIndex();
    lvbi LastValuebi );

    // use Null value for bars other than last N
    return IIfbi lvbi bars, array, Null );
}

// price plot
PlotClose"Close"colorDefaultstyleBar );
 
// MA-50 restricted to last 10-bars only
line MAClose50 );
PlotLastNBarsline10 ), "last 10 bars"colorRed );
 
// shaded area
PlotLastNbarsTrue10 ), ""colorYellowstyleArea|styleOwnScale|styleNoLabel010, -);

Draw chart only for last N bars

In the above chart both Moving average (red line) and yellow shading area have been restricted to last 10-bars only.

In a similar way we can restrict the visibility to most recent day only in intraday chart:

// custom function definition
function ShowLastDay( array )
{
    dn datenum();
    lastDay dn == LastValuedn );

    return IIflastDay, array, Null );
}

// price plot
PlotClose"Close"colorDefaultstyleBar );

// daily high / low on last day only
dailyH TimeFrameGetPrice("H"inDaily );
dailyL TimeFrameGetPrice("L"inDaily );
PlotShowLastDaydailyH ), "dailyH"colorGreenstyleThick  );
PlotShowLastDaydailyL ), "dailyL"colorRedstyleThick  );

// shaded area
colorPaleYellow ColorBlend(colorWhitecolorYellow0.1);
style styleArea styleOwnScale styleNoLabel;
PlotShowLastDay), ""colorPaleYellowstyle010, -);

Draw chart only for last day

Other practical implementations of such technique is presented in these formulas:
http://www.amibroker.com/kb/2007/03/24/how-to-plot-a-trailing-stop-in-the-price-chart/
http://www.amibroker.com/kb/2014/10/10/how-to-draw-regression-channel-programatically/

High-Low of certain hours of the day

$
0
0

When we want to calculate high / low of selected hours of the trading session (e.g. first two trading hours), we can refer to TimeNum() function to identify timestamps of the bars. Then with use of HighestSince and ValueWhen functions we can obtain the high/low readings we need.

tn TimeNum();

// define start/end hours in TimeNum format
StartTime 93000;
Endtime 113000;

// these conditions are true when TimeNum of the bar equals startime/endtime
StartBar tn == StartTime;
EndBar tn == Endtime;

// on the end bar we read the value of highest high or lowest low since the start bar
myH ValueWhenEndBarHighestSinceStartBarHigh ) );
myL ValueWhenEndBarLowestSinceStartBarLow ) );

// display price and high / low arrays
PlotClose"Close"colorDefaultstyleBar|styleThick );
PlotmyH"myH"colorGreenstyleThick );
PlotmyL"myL"colorRedstyleThick );

// grey lines show how highest high / lowest low develop since start bar
PlotHighestSinceStartBarHigh ), ""colorgrey50 );
PlotLowestSinceStartBarLow ), ""colorgrey50 );

// area chart shows the zone we are reading our values from
Plottn >= StartTime AND tn <= Endtime"", 
      ColorBlendcolorYellowcolorWhite0.9 ), 
      styleArea styleOwnScale010, -1);

H-L from selected hours

Now we can use myH and myL arrays in strategies that e.g. check for breakouts from the first two hours of trading session etc.

It is important to remember that the code checks for equality, so the timestamps used in our charts must exactly match the time we specify in the code. The timestamp settings can be defined in Tools->Preferences->Intraday. The approach presented above uses 1-minute data and timestamps showing Start Time of Interval

Positioning area plots behind the grid lines

$
0
0

When we want to paint the background with custom colors to indicate certain states or conditions – we can use area plots style for this purpose. The code example presented below shows green background when Close stays above 50-period moving average and red when below MA-50.

PlotClose"Close"colorDefaultstyleThick);
PlotMA50 MA(Close,50), "MA50"colorBluestyleThick);

color IIfClose MA50colorGreencolorRed );
Plot1""colorstyleArea|styleOwnScale,0,);

However – by default both grid lines and the selector line would get covered by the area plot:

area chart

There is an easy fix for that – AmiBroker allows to specify the Z-axis position too, so we can shift the visibility and order of plots (including their position against grids and other elements) by means of Z-order argument of Plot function.

If we specify the Z-order argument to -1 that means we move the particular plot one level behind and this would also be located below the grids.

PlotClose"Close"colorDefaultstyleThick);
PlotMA50 MA(Close,50), "MA50"colorBluestyleThick);

color IIfClose MA50colorGreencolorRed );
Plot1""colorstyleArea|styleOwnScale,0,1,0,-); // the 8th argument specifies z-order

fixed z-order area chart

More information about use of Z-order can be found in the User’s Guide:
http://www.amibroker.com/guide/h_indbuilder2.html

Viewing all 24 articles
Browse latest View live