Quantcast
Channel: Indicators – AmiBroker Knowledge Base
Viewing all 24 articles
Browse latest View live

How to increase maximum periods of built-in indicators

$
0
0

Built-in indicators and averages which are shipped with AmiBroker use Param() function calls to provide the ability to adjust parameter values through Parameters window. Param function in the code specifies default, minimum, maximum values for the input arguments.

The order of arguments in Param function is the following:

Param"name"defaultvalminmaxstepsincr )

In certain situations, we may however want to use larger period settings than the pre-defined maximum. There is an easy way to adjust the code to achieve such task. Let us consider using built-in Price (all in one) indicator and setting e.g. 200 or 300 periods for Bollinger Bands (default maximum is 100).

To modify the underlying code, we need to:

  1. Click on the chart with right mouse button and choose Edit Formula from the context menu to bring up the AFL code editor
  2. In the code identify Bollinger Band section and the Param function call responsible for setting number of periods and change it from 200 to 300 as shown in the picture below.

    Param call

  3. Approve the changes, by selecting Tools->Apply from the editor’s menu

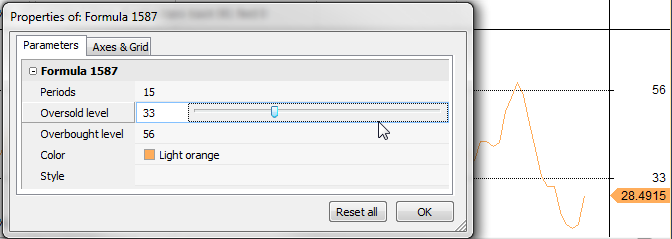
Now we can go back to Parameters dialog and we will be able to set Bollinger Bands Periods setting up to 300 periods.


How to execute part of the formula only when new bar is added

$
0
0

In realtime conditions we may be interested in executing some parts of our formula only once per bar, when a new bar is created (e.g. for auto-trading purposes or just for notification). To do that – we would need to identify the very moment when new bar appears.

This can be done using static variables to record the timestamp of the most recent bar, then comparing current reading with the recorded value. Once the difference is detected – we can conditionally run our code and update the recorded time info.

Such an approach will work if we use timestamps that don’t change with each tick, so preferred option is to use Start Time of Interval for timestamp display (for daily and higher intervals we should unmark “override” box):

Intraday Settings

Then we can use the following code (this sample formula will just play a ding.wav system sound when the new bar is detected):

// read last bar date/time
lastBartime LastValueDateTime() );

// we use per-symbol variable
// you may consider to add GetChartID() key if you want
// to use the formula in multiple charts shown at the same time
varName Name() + "_lastdt";

// read recorded date/time from last execution
recordedTimestamp NzStaticVarGetvarName ) );

// code runs conditionally only when new bar is detected
if( lastBarTime != recordedTimestamp )
{
    // record new bar datetime
    StaticVarSetvarNamelastBartime );
    
    //////////////////////////////////////
    // main code here
    PlaySound"c:\\windows\\media\\ding.wav" );
    //////////////////////////////////////
}

// sample indicator code
PlotClose"Close"colorDefaultstyleBar );

Newer AmiBroker versions (>5.60) can use this for reading last bar timestamp (this is faster than using DateTime() function).

lastBartime Status("lastbarend");

Adding custom grid levels to RSI indicator

$
0
0

Built-in RSI indicator offers the ability to display one of predefined grid levels to indicate oversold and overbought regions. This can be done in Axes&Grid tab of Parameters window available under right-mouse button.

Grid settings

If we require more flexibility, then as an alternative, we could modify the code and call PlotGrid function to display the custom grid lines. This allows to specify any level for the grids. A modified formula is presented below:

SetChartOptions0chartShowArrows);
periods Param"Periods"151200);
oversold Param"Oversold level"151100);
overbought Param"Overbought level"851100);

PlotRSIperiods), _DEFAULT_NAME(), ParamColor"Color"colorCycle ), ParamStyle("Style")  );
PlotGridoversold );
PlotGridoverbought );

Param window settings

Now, since the formula uses Param function as input, the custom grid levels can be defined and modified in Parameters tab.

How to read highest high value of future bars

$
0
0

Built in HHV and LLV functions allow to read highest high or lowest low of n-past bars. If we want to refer to future values, there is an easy way to do it using simple Ref function and just shift HHV or LLV reading from N-bars ahead. A ready to use function showing such approach is presented below:

// function definitions
function futureHHV( array, periods )
{
   return RefHHV( array, periods ), periods );
}
function futureLLV( array, periods )
{
   return RefLLV( array, periods ), periods );
}

// sample use
PlotClose"Close"colorDefaultstyleBar );
PlotHHVH20 ), "HHV"colorGreenstyleDashed );
PlotfutureHHVH20 ), "Future HHV"colorGreenstyleThick );
PlotLLVL20 ), "LLV"colorRedstyleDashed );
PlotfutureLLVL20 ), "Future LLV"colorRedstyleThick );

And here is the chart produced by the formula above:

Future HHV

Viewing all 24 articles
Browse latest View live